Table of Contents:
What is DKIM?
DKIM (Domain Keys Identified Mail) is a complex email protocol that allows a sender's identity to be authenticated by the recipient to help combat email fraud.
How does it work?
A public key is used to create a DNS record. That same key is also used to digitally sign the header of emails that are sent. When the recipient's provider receives the email, they check the sender's DNS records and the sender's authenticity is validated by the matching key. The message can then be delivered to the recipient with confidence that the sender is who they claim to be.

Why is it important?
DKIM affords the greatest assurance that the sender is who they say they are and gives email providers a way to track and hold senders accountable for the messages they're sending. As a result, deliverability of these messages is greater and inbox placement is improved.
What's special about Infusionsoft's implementation of DKIM?
Normally, implementing DKIM requires a domain owner to create public and private RSA keys which are used in the authentication process. To make it easier for you to implement DKIM, Infusionsoft has eliminated this complexity by creating these keys on your behalf. With this approach, you only need to create a CNAME record in your DNS that points back to the Infusionsoft servers, and turn on the function in your Infusionsoft account. We've tried to further simplify this process by providing simple, step-by-step instructions directly within your Infusionsoft account to help guide you.
How do I set it up?
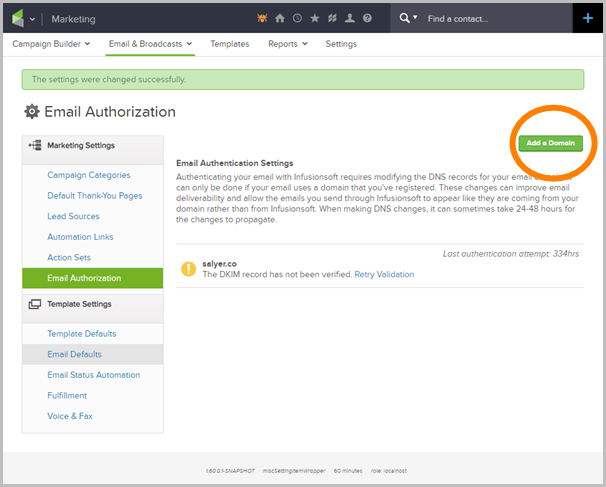
- Go to Marketing > Settings > Email Authorization
- Click the Add a Domain button
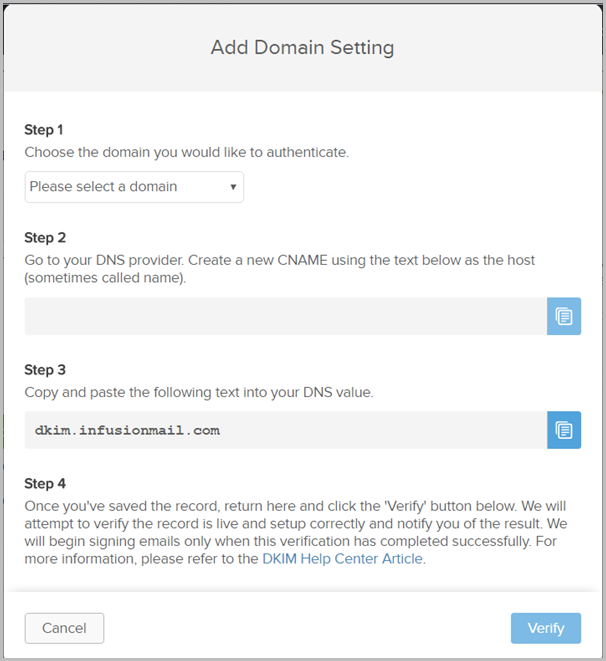
- In the window that appears, select the domain for which you would like to create a DKIM key from the drop-down. This will populate the field in step two.


Pro Tip! You can add additional email domains by adding that email domain to a User Record under Admin > Settings > Users in the "Email" field. 
- Now, follow steps that appear on-screen. These instructions require you to create a CNAME entry in your DNS records. If you need assistance with this step, we recommend you contact your DNS provider for assistance because the steps may vary depending on your provider.
Below are links to help articles of several common DNS providers to help you. For most of the providers listed below, remove your domain name from the URL in step 2 and use that value for the Host.
For example, if the URL is "d5e8e10f-67fd-4e29-87dd-58f7b3760b10._domainkey.yourdomain.com", use only "d5e8e10f-67fd-4e29-87dd-58f7b3760b10._domainkey" for the Host value.- GoDaddy
- BlueHost
- Host Gator
- DreamHost
- Liquid Web
- In-Motion
Important Note! Some DNS providers are not compatible with this method of DKIM
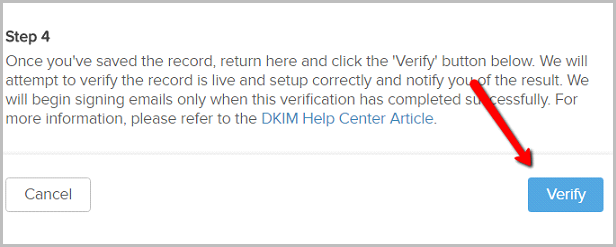
- In the last step, you'll click the Verify button at the bottom of the window to continue. Infusionsoft will attempt to validate the CNAME record you created in your DNS. The record must be live in order for your Infusionsoft account to successfully validate it. If the record cannot be verified, wait until the Time-To-Live (TTL) settting of your DNS provider has passed, and try to validate again by clicking the Retry Validation link.
- Once the domain has been verified, Infusionsoft will begin using DKIM when sending emails on your behalf.

DKIM Re-validation Steps
Recently we deployed updates to how we assign DKIM to outgoing emails. If you setup DKIM prior to 1/17/17, you may need to follow these steps to ensure DKIM is signed properly for mail from your Infusionsoft application. The changes require you to update your CNAME record that you added to your domain and then to re-validate your domain. There are 2 steps to complete:
- Update Your CNAME record - These instructions require you to edit a CNAME entry in your DNS records. If you need assistance with this step, we recommend you contact your DNS provider because the steps may vary depending on your provider.
- Locate the CNAME entry in your DNS records where you previously entered infusionmail.com and replace it with dkim.infusionmail.com, then save the record.
- If you have multiple domains that were previously verified, you will need to do this for each CNAME record on each domain.
- Re-Validate Your DKIM record
- Login to your Infusionsoft application, navigate to the Marketing module and click on Settings.
- On this page, look at the navigation bar on the left and click on Email Authentication.
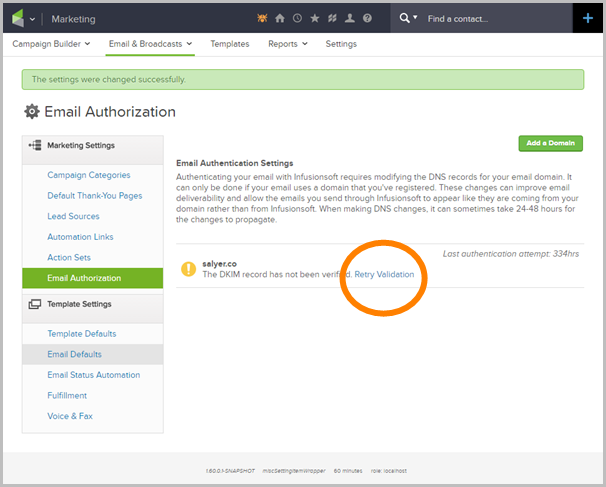
- Now you should see your domain(s). Click on the hyperlink Retry Validation.
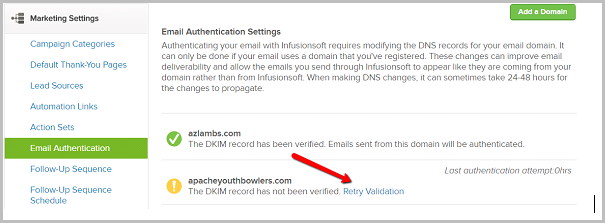
- This will open up a Retry Domain Verification pop-up window. Click on the Verify Button to complete the update. If this fails to validate, please wait and try again (it can take hours, depending on your DNS provider). If you have multiple domains that were previously verified, you will need to repeat these steps for each Domain.