Setting up a new merchant checklist
| Each merchant provider has specific terms of service, it is important to review these before deciding on a merchant. For additional information, click here and for our terms of service, click here then scroll down to #4 Reservation of Rights |
| Verify that your new merchant is NOT in test mode. If it’s in test mode, it will “successfully” process payment, but no funds will actually be collected. |
| Verify payment is going through on the new merchant BEFORE cancelling your old merchant |
| If you cancel your old merchant, you will no longer be able to issues refunds via that merchant, and must consider an alternative method. |
Common Issues
Orders placed through PayPal are unable to change to another merchant. This is because reference transactions are tied to billing agreements on the PayPal account, if you make a new PayPal account those reference transactions/billing agreements will not work, and will cause subscriptions and payment plans to fail.
Historical orders that require a CVV/CVC/CID can be manually moved to Infusionsoft Payments but our Data team will need to tokenize the saved CVV/CVC/CID for you. To contact one of our representatives who can help get the process started, click here.
We are unable to move historical orders for other merchants that require a CVV/CVC/CID because we are unable to tokenize their credit cards.
- For HISTORICAL orders, there are several different locations that the previous merchant will still be recorded. You must update:
- Any open orders with a balance due, including:
- Orders where the payment defaulted
- Orders with a payment plan
- Previously created subscription records
- Open orders under the subscription record that are unpaid
- Any open orders with a balance due, including:
Go through each step to correctly update to your new Default Merchant
Step 1: Update Your Default Merchant
This is for shopping cart and order form orders.
E-Commerce Setup > Payment Types
- Check the radio button next to the preferred default merchant IF you have more than one merchant. If there’s only one merchant setup there wont be a checkbox.

- Check the radio button next to the preferred default merchant IF you have more than one merchant. If there’s only one merchant setup there wont be a checkbox.


Note: Not all card types are accepted by all merchants. Make sure that your merchant accepts all the same cards that you have been accepting, AND in the same manner (e.g. Master vs. MasterCard).
For step 2, click here
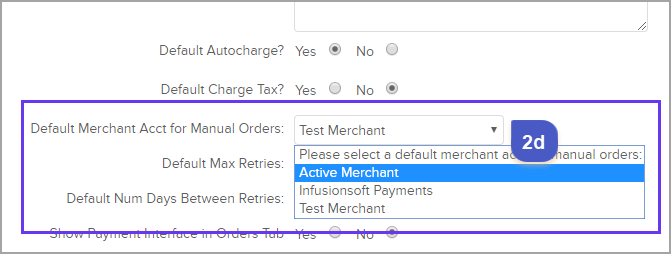
Step 2: Change the Default Merchant for Manual Orders
This is for any instance where the merchant is required but not given, most commonly with manual orders.
Pro Tip! You don’t have to use the same merchant for all orders. You can specify a different merchant on manual order and on order forms.
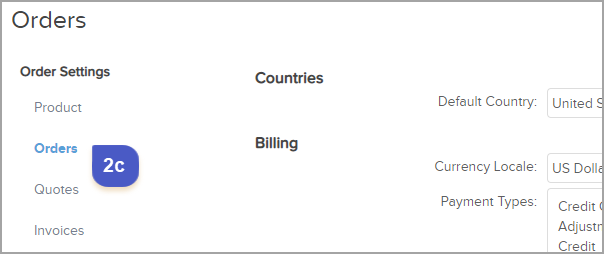
E-Commerce > Settings > Orders > Default Merchant for Manual Orders


For step 3, click here
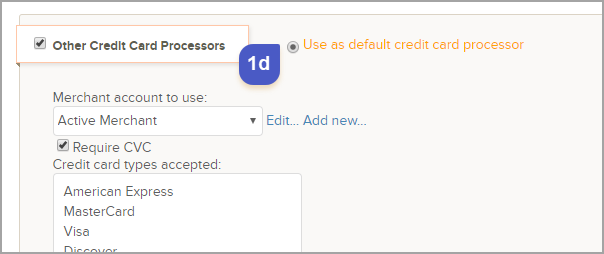
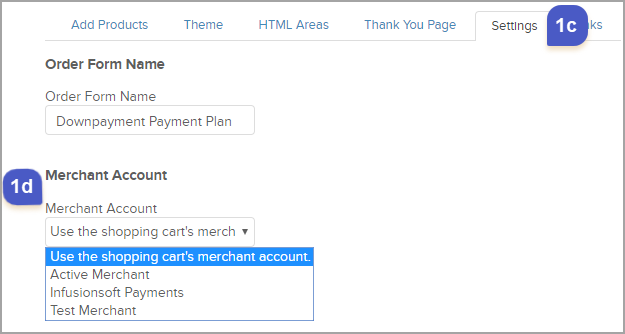
Step 3: Update Your Order Forms Merchant Settings
- E-Commerce Setup > Order Forms > Settings tab > Select the merchant from the "Merchant Account" drop down


For Step 4, click here
Step 4: Update Merchant used on Subscription Records
- Go to the contact record
- From the bottom row of tabs click the "Orders" tab

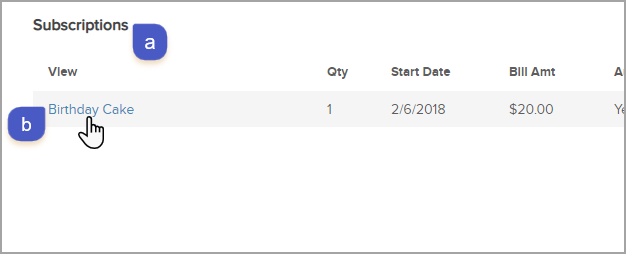
- Scroll down to "Subscriptions" and click the subscription name (blue hyperlink)
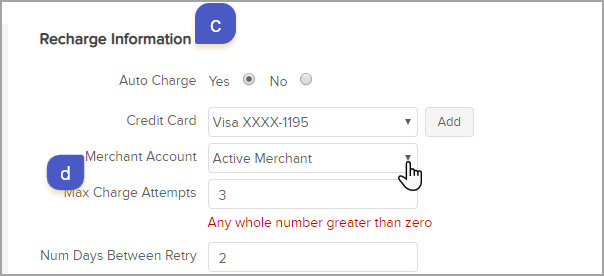
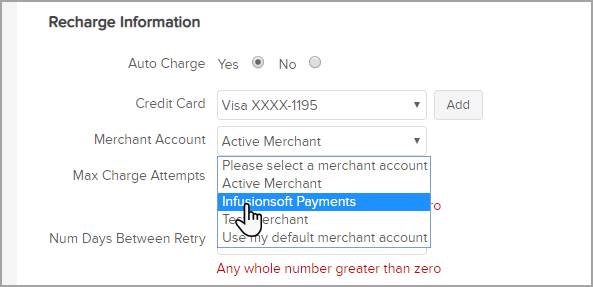
- Under the Subscription “Recharge Information” Select the drop-down for Merchant Account and select your new Merchant account from the list
- Click "Save"


For Step 5, click here
Step 5: Update previously created Subscription Orders
Note: This will be needed for past due and/or failed payments. The past due balance will attempt to auto charge if the order has not reached it's maximum attempts and is not outside of the outstanding auto charge window (E-Commerce > Settings > Order)
- Follow the steps from "How to locate and update subscription records"
- Then in a subscription record scroll down and under the "Save" button, click on the unpaid “Invoice” (blue hyperlink) for the past due and/or failed order you want to update
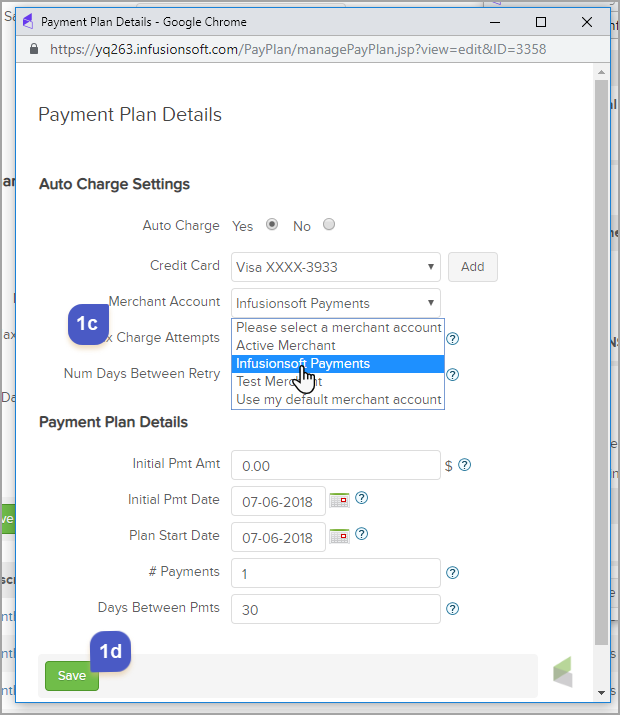
- Scroll down to "Payment Plan" area and then click “Edit Payment Plan” button

- Select the drop-down for Merchant Account and select your new Merchant account from the list
- Click "Save”
- Then in a subscription record scroll down and under the "Save" button, click on the unpaid “Invoice” (blue hyperlink) for the past due and/or failed order you want to update


Note: Past due balance will attempt to auto-charge if the order(s) have not reached their maximum attempts.
What are Max Retries and Outstanding time-frame Settings?
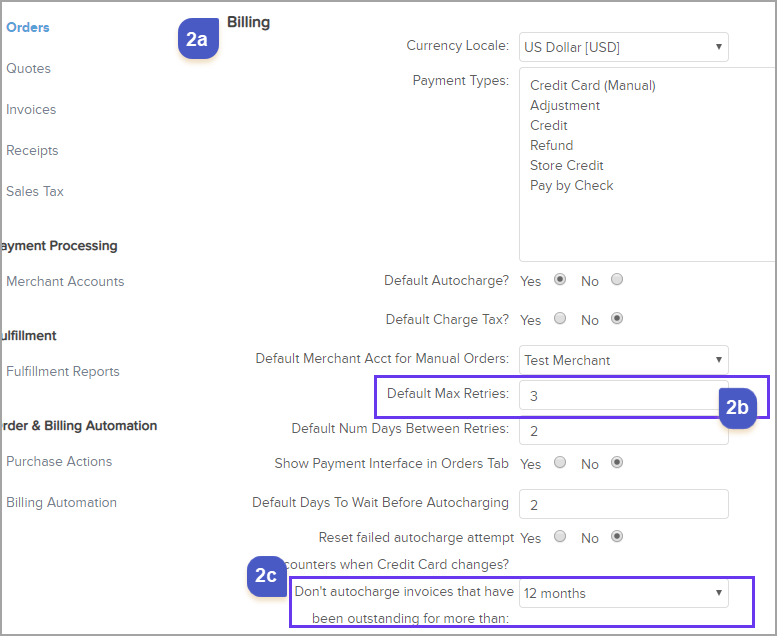
When a payment fails, the Max Retries setting will attempt to process the payment based on the number entered in its field. Once the order has attempted the number of Max Retries, there will be no further attempts unless it is reset. By default the Max Retries is set to three.
As for the Don't Autocharge Invoices That Have Been Outstanding For More Than, select a time range limit for autocharge attempts. The system will no longer try to charge the card after this limit is reached. The default is 12 months. You can reduce this to 9,6, 3, or 1 month.
Below will walk you through the steps to enable to the settings and how to reset once the Max Retries have been reached.
Note: Changing the merchant does not reset the number of "Max Retries" attempts for an order. If an order reached the "Max Retries" limit when the merchant is changed, you will need to reset the retry attempts.
- Go to E-Commerce > Settings
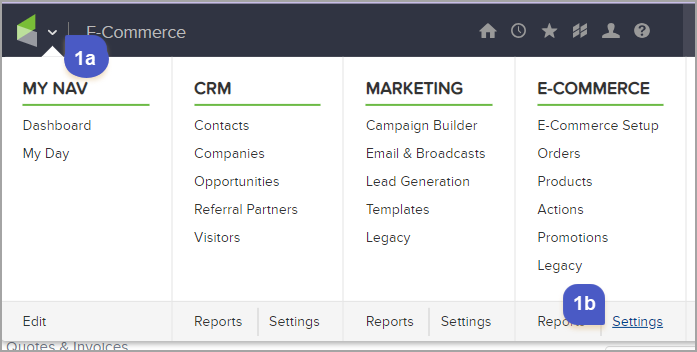
- From the left navigation click "Orders"
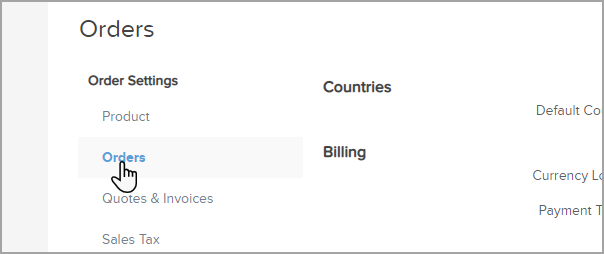
- Under "Billing"
- Locate "Default Max Retries": the number in the field is the number of times an unpaid order will attempt to bill
- The drop-down next to "Don't autocharge invoice that have been outstanding for more than" is the time-frame that an order can be auto-charge after the payment method has been updated
- Under "Billing"


Reset Max Retries
In order for the "Reset Failed Attempts" button to be visible in an order that has reached the Max Retries

The following must be met:
- The "Reset failed autocharge attempt" setting must be enabled under E-Commerce > Settings > left menu click Orders > scroll down under "Billing"
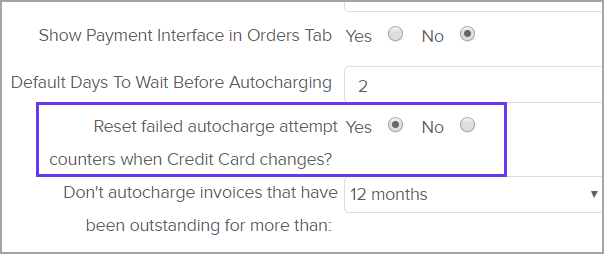
- The maximum amount of attempts must be reached
