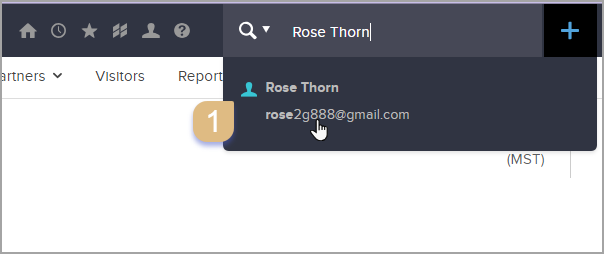
- Navigate to the Contact Record
- Go to the "Notes" section
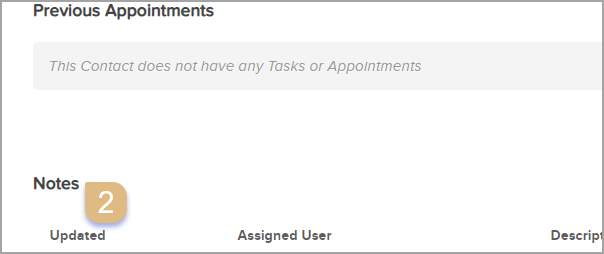


Note: The number of "Notes" displayed is limited to 10. You can click the "View All" to view all notes for the contact.

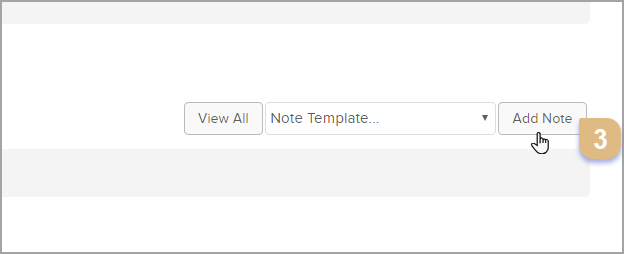
Which opens as a pop-up window.

- Click on the "Add Note", which will open as a pop up window.
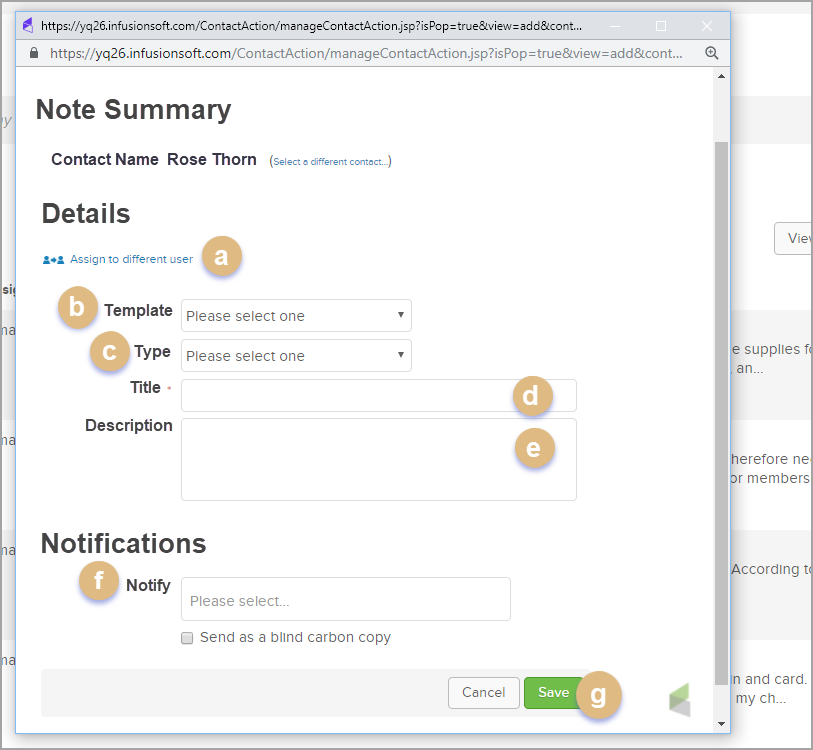
- (Optional) Assign to different user: Select a user from the drop-down to associate someone else with the note (if your user permissions allow).
- (Optional) Template: This drop-down list includes pre-populated note templates.
- (Optional) Type: Select a type that describes the interaction you're recording (i.e. Call, Email, etc.). Note: You can modify this list through CRM > Settings > Task/Appt/Note Settings (if your user permissions allow.)
- Title: Enter a subject line for the note. The subject is visible in the contact history; it should be a short description of the interaction.
- Description: Enter or customize the notes. This is a more detailed description of the interaction.
- (Optional) Notify: Select one or more users to send them a copy of the note by email.
- Click on the Save button to record the note in the contact record.


Pro-Tip: You can also use note templates to record repetitive interactions. Note templates can also trigger automation in Infusionsoft. They can help you work more efficiently and reduce the possibility of errors.
Important Note: Your user permissions may not allow you to delete a note from a contact history. The Can edit all records permission needs to be set correctly.